How To Plant A Pineapple
If possible, buy organically grown pineapples, you can then grow them better yourself.
The pineapple is a delicious fruit that tastes much better and is much healthier if you don’t enjoy it softly cooked and sugar-coated from the can, but buy it fresh as a whole fruit in the store.
Of course, a pineapple as fresh fruit is more expensive than a can from the pantry, but once you have a pineapple in your house, you can make a lot more out of it than a fruit salad!
The stalk of the pineapple can be grown into a new pineapple plant. An ideal and extraordinary gift or an exotic addition to your own indoor plant jungle on the windowsill.
Important when buying the pineapple
So that growing your own pineapple plant works, everything has to be right when you buy the fruit. Choose a fruit that is ripe but not yet too soft. It shouldn’t have any rotten spots or bruises and the leafy green must be green, firm and fresh.
If the fruit has too many withered, limp, or parched leaves, choose a different one. The stronger and healthier the green, the greater the chance that your cultivation will work.
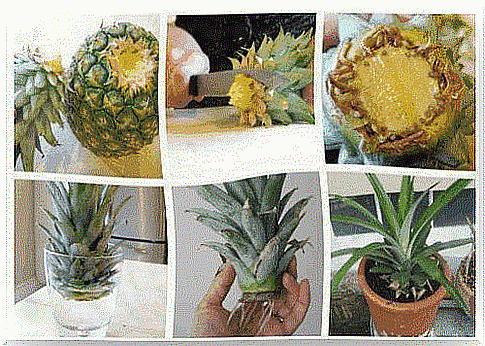
First step:
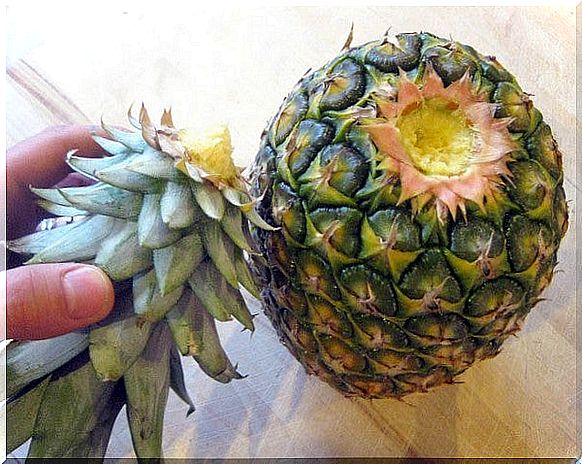
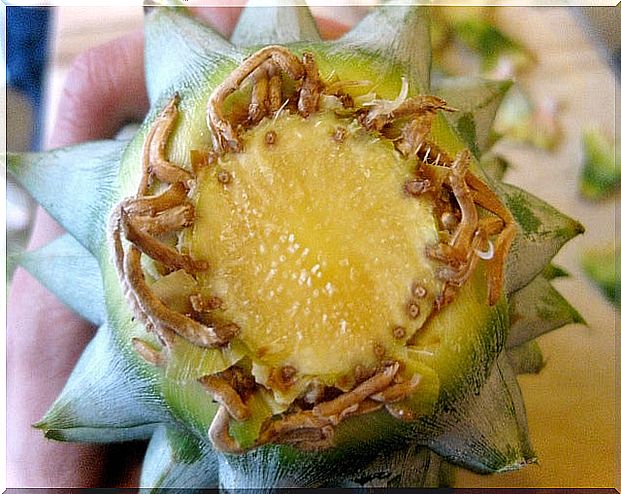
Now separate the fruit from the leaf stem . Be careful with the fruit and leaves so that you don’t hurt anything. With slight twisting and kinking movements you can separate the upper part from the fruit.
If you cannot do this without tools, use a sharp knife and carefully and not too tightly cut the green from the fruit.
Second step:
Now clean the lower part of the leaf green of any pulp residues, as these can rot easily and prevent successful cultivation.
While you are cleaning the stalk of the pulp, make sure that the small roots that may already have formed on the lower leaf ring are not damaged.
Third step:
Wash your breeding base well, clean the leaves of any remaining pulp or juice that may have stuck to them and rinse the cut well.
The cleaner you work, the higher the chance that everything will work out! Fruit juice or pulp residues on the leaves can attract fruit flies. And you certainly don’t want to keep them with you!
Fourth step:
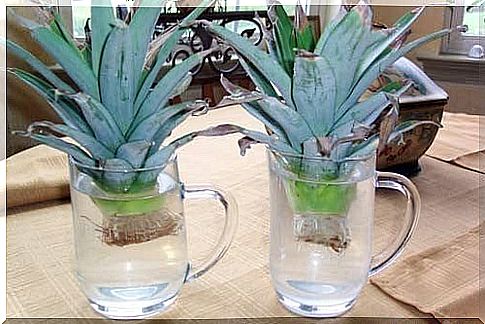
Place the well-cleaned and well-prepared leaf stem in a vessel with water. It is ideal if the stalk is in fresh, clear water up to the lower edge of the lower leaf wreath.
Make sure the jar is big enough so that the lower part is well bathed in water. For example, an empty glass of nut nougat spread works well.
Make sure it doesn’t tip over. Due to the heavy weight of the leaf stem, the center of gravity is very high and it can tip over easily!
Fifth step:
Place the glass with the stalk in a light, but not too warm place. A place on the window sill is good if the heater is not running underneath.
A bright hallway and a bright staircase are also ideal. You will find the ideal temperature in the bedroom. If the glass is too warm, rot can develop quickly.
Sixth step:
Patience! Please change the water in the glass every other day at the latest and rinse the stalk under running tap water from time to time. Check regularly whether small, light, fine roots are already forming. Patience! At some point the time will come!
Seventh step:
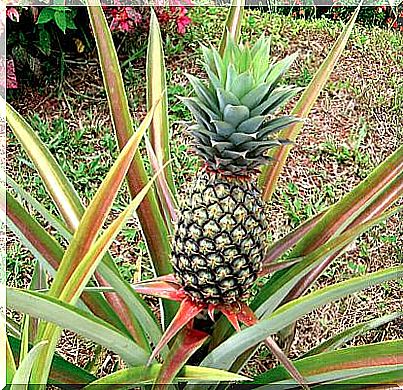
Planting time! Have enough roots formed in the water glass? If so, rinse the root ball well again under running water and prepare the planter. It should be significantly larger than the widest leaf wreath and deep enough for the roots.
The bottom layer in the pot should always consist of coarser gravel so that no waterlogging can build up. Make sure that the drain hole in the pot is not clogged; if necessary, place a pottery shard over it. Mix the potting soil with some sand to create a loose substrate.
Then hold the young plant in the pot with one hand and carefully pour the planting substrate around the roots with the other hand. Finally, press firmly so that your new plant cannot loosen with the root ball and then water well.
While watering, you can shake the pot a little more so that the soil can wrap around the roots.
Eighth step:
Finished! Don’t forget to water your new tropical plant regularly, but make sure it’s not too wet so the roots don’t rot.
Would you like to give away the exotic plant, decorate it with bows or at Christmas time as a Christmas tree and look forward to the unusual new houseplant with the recipient!